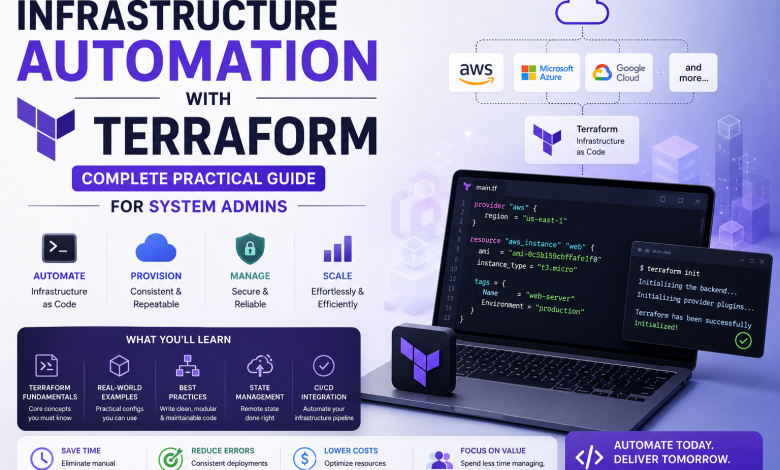
Infrastructure Automation with Terraform: Complete Practical Guide for System Admins

Introduction: Infrastructure Automation Changes Everything
Managing infrastructure manually is a big problem.
Infrastructure automation with Terraform solves it.
What used to take 6 hours now takes 6 minutes.
What used to require 5 people now one person does.
This guide teaches infrastructure automation with Terraform practically:
- Real setup steps
- Real AWS/Azure examples
- Real problem-solving
- Real best practices
Not theory. Just hands-on infrastructure automation.
What Is Terraform? (Simplified)
Terraform is infrastructure as code tool.
Instead of clicking buttons in AWS console:
You write code.
Terraform reads code.
Terraform creates infrastructure.
Infrastructure is consistent, repeatable, version-controlled.
Why infrastructure automation matters:
Manual clicks:
- Inconsistent (different each time)
- Error-prone (easy to miss something)
- Slow (takes hours)
- Not repeatable (hard to do again)
- No history (who changed what?)

Terraform code:
- Consistent (identical every time)
- Reliable (code doesn't forget)
- Fast (minutes)
- Repeatable (run again anytime)
- Version control (see all changes)
Part 1: Installing and Setting Up Terraform
Step 1: Install Terraform
On Windows:
1. Download Terraform from https://www.terraform.io/downloads.html
2. Unzip file to C:\Program Files\Terraform
3. Add to PATH environment variable
4. Open PowerShell
5. Type: terraform version
6. Should show version (e.g., Terraform v1.5.0)
On Mac:
brew install terraform
terraform version
On Linux:
wget https://releases.hashicorp.com/terraform/1.5.0/terraform_1.5.0_linux_amd64.zip
unzip terraform_1.5.0_linux_amd64.zip
sudo mv terraform /usr/local/bin/
terraform version
Time: 10 minutes
Reference: Official Terraform Download
Step 2: Configure Cloud Provider Access
For AWS:
1. Create AWS account if needed
2. Create IAM user with admin access
3. Get Access Key ID and Secret Access Key
4. Install AWS CLI: https://aws.amazon.com/cli/
5. Configure credentials:
   aws configure
   Enter Access Key ID
   Enter Secret Access Key
   Select region (e.g., us-east-1)
For Azure:
1. Create Azure account
2. Install Azure CLI: https://learn.microsoft.com/en-us/cli/azure/install-azure-cli
3. Login:
   az login
4. Choose subscription
Time: 15-20 minutes
Reference: AWS IAM Setup
Part 2: First Infrastructure Automation Project
Step 3: Create Your First Terraform Configuration
Create file: main.tf
Simple AWS example (create one EC2 instance):
# Configure the AWS provider
terraform {
  required_providers {
    aws = {
      source  = "hashicorp/aws"
      version = "~> 5.0"
    }
  }
}

provider "aws" {
  region = "us-east-1"
}

# Create a security group
resource "aws_security_group" "web" {
  name        = "web-security-group"
  description = "Allow HTTP and SSH"

  ingress {
    from_port   = 80
    to_port     = 80
    protocol    = "tcp"
    cidr_blocks = ["0.0.0.0/0"]  # Allow from anywhere
  }

  ingress {
    from_port   = 22
    to_port     = 22
    protocol    = "tcp"
    cidr_blocks = ["0.0.0.0/0"]  # Allow from anywhere
  }

  egress {
    from_port   = 0
    to_port     = 0
    protocol    = "-1"
    cidr_blocks = ["0.0.0.0/0"]  # Allow all outbound
  }
}

# Create an EC2 instance
resource "aws_instance" "web" {
  ami                    = "ami-0c55b159cbfafe1f0"  # Amazon Linux 2
  instance_type          = "t2.micro"
  vpc_security_group_ids = [aws_security_group.web.id]

  user_data = <<-EOF
              #!/bin/bash
              yum update -y
              yum install -y httpd
              systemctl start httpd
              systemctl enable httpd
              echo "<h1>Hello from Terraform</h1>" > /var/www/html/index.html
              EOF

  tags = {
    Name = "web-server"
  }
}

# Output the instance IP
output "instance_ip" {
  value       = aws_instance.web.public_ip
  description = "Public IP of web server"
}
What this does:
- Creates security group (firewall rules)
- Creates EC2 instance (server)
- Installs web server automatically
- Outputs the IP address
Time: 10 minutes to write
Step 4: Deploy Infrastructure (Infrastructure Automation in Action)
# Initialize Terraform (downloads AWS provider)
terraform init

# Preview what will be created
terraform plan

# Create the infrastructure
terraform apply
# Type "yes" when prompted

# Wait 2-3 minutes for instance to launch
# Terraform will output the IP address
Output:
instance_ip = "54.123.45.67"Time: 5 minutes
Visit: http://54.123.45.67 in browser → See “Hello from Terraform”
Step 5: Modify Infrastructure (Change Code, Apply Changes)
Edit main.tf:
Change instance type:
instance_type = "t2.small" # Was t2.microApply changes:
terraform plan    # See what will change
terraform apply   # Apply the change
Terraform automatically:
- Stops micro instance
- Starts small instance
- Maintains everything else
No downtime. No manual work.
Part 3: Real-World Infrastructure Automation Examples
Example 1: VPC with Multiple Subnets and EC2 Instances
Use case: Create complete network infrastructure
# Create VPC
resource "aws_vpc" "main" {
  cidr_block           = "10.0.0.0/16"
  enable_dns_hostnames = true

  tags = {
    Name = "main-vpc"
  }
}

# Create public subnet
resource "aws_subnet" "public" {
  vpc_id            = aws_vpc.main.id
  cidr_block        = "10.0.1.0/24"
  availability_zone = "us-east-1a"

  tags = {
    Name = "public-subnet"
  }
}

# Create private subnet
resource "aws_subnet" "private" {
  vpc_id            = aws_vpc.main.id
  cidr_block        = "10.0.2.0/24"
  availability_zone = "us-east-1b"

  tags = {
    Name = "private-subnet"
  }
}

# Create Internet Gateway
resource "aws_internet_gateway" "main" {
  vpc_id = aws_vpc.main.id

  tags = {
    Name = "main-igw"
  }
}

# Create route table for public subnet
resource "aws_route_table" "public" {
  vpc_id = aws_vpc.main.id

  route {
    cidr_block      = "0.0.0.0/0"
    gateway_id      = aws_internet_gateway.main.id
  }

  tags = {
    Name = "public-rt"
  }
}

# Associate route table with subnet
resource "aws_route_table_association" "public" {
  subnet_id      = aws_subnet.public.id
  route_table_id = aws_route_table.public.id
}

# Create 3 EC2 instances in public subnet
resource "aws_instance" "web" {
  count              = 3
  ami                = "ami-0c55b159cbfafe1f0"
  instance_type      = "t2.micro"
  subnet_id          = aws_subnet.public.id

  tags = {
    Name = "web-server-${count.index + 1}"
  }
}

# Output IPs
output "instance_ips" {
  value       = [for instance in aws_instance.web : instance.public_ip]
  description = "Public IPs of all instances"
}
What this infrastructure automation creates:
- VPC (isolated network)
- 2 subnets (public and private)
- Internet Gateway (for internet access)
- Route table (for routing)
- 3 EC2 instances (in public subnet)
Execute:
terraform init
terraform apply
# Creates entire network in minutes
Example 2: RDS Database with Infrastructure as Code
Use case: Create production database automatically
# Create RDS security group
resource "aws_security_group" "rds" {
  name = "rds-security-group"
  vpc_id = aws_vpc.main.id

  ingress {
    from_port       = 5432
    to_port         = 5432
    protocol        = "tcp"
    security_groups = [aws_security_group.web.id]
  }
}

# Create DB subnet group
resource "aws_db_subnet_group" "main" {
  name       = "db-subnet-group"
  subnet_ids = [aws_subnet.private.id, aws_subnet.public.id]

  tags = {
    Name = "db-subnet-group"
  }
}

# Create RDS instance
resource "aws_db_instance" "main" {
  identifier     = "production-database"
  engine         = "postgres"
  engine_version = "15.3"
  instance_class = "db.t3.micro"

  allocated_storage = 20
  storage_type      = "gp2"

  db_name  = "myappdb"
  username = "admin"
  password = "MySecurePassword123!"  # Better: use AWS Secrets Manager

  db_subnet_group_name   = aws_db_subnet_group.main.name
  vpc_security_group_ids = [aws_security_group.rds.id]

  backup_retention_period = 30
  multi_az                = true

  tags = {
    Name = "production-db"
  }
}

# Output database endpoint
output "database_endpoint" {
  value       = aws_db_instance.main.endpoint
  description = "RDS endpoint"
}
What this creates:
- RDS PostgreSQL database
- Configured for production
- Automatic backups (30 days)
- Multi-AZ (high availability)
Security note: Don’t hardcode passwords. Use AWS Secrets Manager.
Reference: AWS Secrets Manager with Terraform
Example 3: Load Balancer with Auto-Scaling
Use case: Infrastructure automation for scalable applications**
# Create load balancer
resource "aws_lb" "main" {
  name               = "app-load-balancer"
  internal           = false
  load_balancer_type = "application"
  subnets            = [aws_subnet.public.id, aws_subnet.public.id]

  tags = {
    Name = "app-lb"
  }
}

# Create target group
resource "aws_lb_target_group" "app" {
  name        = "app-target-group"
  port        = 80
  protocol    = "HTTP"
  vpc_id      = aws_vpc.main.id
}

# Create listener
resource "aws_lb_listener" "app" {
  load_balancer_arn = aws_lb.main.arn
  port              = "80"
  protocol          = "HTTP"

  default_action {
    type             = "forward"
    target_group_arn = aws_lb_target_group.app.arn
  }
}

# Create launch template
resource "aws_launch_template" "app" {
  name_prefix   = "app-"
  image_id      = "ami-0c55b159cbfafe1f0"
  instance_type = "t2.micro"
}

# Create auto-scaling group
resource "aws_autoscaling_group" "app" {
  name                = "app-asg"
  vpc_zone_identifier = [aws_subnet.public.id]
  target_group_arns   = [aws_lb_target_group.app.arn]
  health_check_type   = "ELB"

  min_size         = 2
  max_size         = 10
  desired_capacity = 3

  launch_template {
    id      = aws_launch_template.app.id
    version = "$Latest"
  }
}

# Output load balancer DNS
output "load_balancer_dns" {
  value = aws_lb.main.dns_name
}
What this creates:
- Load balancer (distributes traffic)
- Auto-scaling group (automatically adds/removes servers)
- Automatically scales from 2 to 10 instances
- High availability automatically
Part 4: Terraform State Management (Critical)
Understanding Terraform State
Terraform maintains terraform.tfstate file.
This file stores:
- What infrastructure exists
- Configuration of each resource
- Metadata
Important: This file is sensitive. Protect it.
State Management Best Practices
Local state (for learning only):
tfstate file on your computer
Works for single person
NOT for teams
Remote state (for production):
AWS S3 backend:
terraform {
  backend "s3" {
    bucket = "my-terraform-state"
    key    = "prod/terraform.tfstate"
    region = "us-east-1"
  }
}
Azure Storage backend:
terraform {
  backend "azurerm" {
    resource_group_name  = "rg-terraform"
    storage_account_name = "mystorageaccount"
    container_name       = "tfstate"
    key                  = "prod.tfstate"
  }
}
Benefits:
- Team can share state
- State is backed up
- State is version controlled
- Infrastructure is consistent across team
Reference: Terraform State Management
Part 5: Terraform Modules (Reusable Code)
What Are Modules?
Module = Reusable Terraform code.
Instead of writing VPC code every time, create a module.
Module structure:
modules/
├── vpc/
│   ├── main.tf
│   ├── variables.tf
│   └── outputs.tf
├── rds/
│   ├── main.tf
│   ├── variables.tf
│   └── outputs.tf
└── ec2/
    ├── main.tf
    ├── variables.tf
    └── outputs.tf
Using Modules
module "vpc" {
  source = "./modules/vpc"

  cidr_block = "10.0.0.0/16"
  name       = "production-vpc"
}

module "rds" {
  source = "./modules/rds"

  vpc_id           = module.vpc.vpc_id
  db_name          = "production_db"
  db_username      = "admin"
  db_password      = "SecurePassword123"
}

module "ec2" {
  source = "./modules/ec2"

  vpc_id = module.vpc.vpc_id
  count  = 3
}
Benefits:
- Write once, use everywhere
- Consistent infrastructure
- Easy to maintain
- Easy to scale
Part 6: Best Practices for Infrastructure Automation
1. Use Variables for Flexibility
Bad (hardcoded):
instance_type = "t2.micro"Good (variable):
variable "instance_type" {
  type    = string
  default = "t2.micro"
}

resource "aws_instance" "web" {
  instance_type = var.instance_type
}
Use it:
terraform apply -var="instance_type=t2.small"2. Use Environment Files
Create production.tfvars:
instance_type = "t2.large"
desired_capacity = 10
environment = "production"
Create staging.tfvars:
instance_type = "t2.micro"
desired_capacity = 2
environment = "staging"
Deploy:
terraform apply -var-file="production.tfvars"
terraform apply -var-file="staging.tfvars"
3. Use Outputs for Important Information
output "database_endpoint" {
  value       = aws_db_instance.main.endpoint
  description = "Database connection string"
}

output "load_balancer_dns" {
  value       = aws_lb.main.dns_name
  description = "Load balancer DNS"
}

output "instance_ips" {
  value       = [for instance in aws_instance.web : instance.public_ip]
  description = "All instance IPs"
}
4. Organize Code Logically
terraform/
├── main.tf              (main resources)
├── variables.tf         (variable definitions)
├── outputs.tf           (outputs)
├── terraform.tfvars     (variable values)
├── dev.tfvars           (dev-specific values)
├── prod.tfvars          (prod-specific values)
└── modules/
    ├── vpc/
    ├── rds/
    └── ec2/
5. Use .gitignore
Never commit sensitive files:
# .gitignore
terraform.tfstate
terraform.tfstate.backup
*.tfvars
.terraform/
Part 7: Common Terraform Patterns
Pattern 1: Count (Create Multiple Resources)
resource "aws_instance" "web" {
  count         = 5  # Create 5 instances
  ami           = "ami-0c55b159cbfafe1f0"
  instance_type = "t2.micro"

  tags = {
    Name = "web-${count.index}"  # Names: web-0, web-1, etc
  }
}

# Access specific instance
output "first_instance_ip" {
  value = aws_instance.web[0].public_ip
}
Pattern 2: For_each (Create from Map)
variable "environments" {
  default = {
    dev  = "t2.micro"
    staging = "t2.small"
    prod = "t2.large"
  }
}

resource "aws_instance" "app" {
  for_each = var.environments

  ami           = "ami-0c55b159cbfafe1f0"
  instance_type = each.value

  tags = {
    Name = "app-${each.key}"
  }
}
Pattern 3: Locals (Reusable Values)
locals {
  environment = "production"
  project     = "myapp"

  common_tags = {
    Environment = local.environment
    Project     = local.project
    ManagedBy   = "Terraform"
  }
}

resource "aws_instance" "web" {
  tags = local.common_tags
}
Part 8: Troubleshooting Common Issues
Issue 1: State Lock
Problem: “Error acquiring the state lock”
Cause: Another terraform apply is running
Solution:
# Force unlock (dangerous!)
terraform force-unlock LOCK_ID

# Better: Wait for other apply to finish
Issue 2: Resource Already Exists
Problem: “Error creating resource: already exists”
Cause: Resource created outside Terraform
Solution:
# Import existing resource
terraform import aws_instance.web i-1234567890abcdef0

# Now Terraform knows about it
Issue 3: Syntax Errors
Problem: “Invalid or unsupported combinations of arguments”
Solution:
# Validate syntax
terraform validate

# Format code properly
terraform fmt
Part 9: Real-World Infrastructure Automation Workflow
Complete Production Setup
# 1. Initialize
terraform init

# 2. Plan and review
terraform plan -var-file="production.tfvars" > plan.txt
# Review plan.txt before applying

# 3. Apply
terraform apply -var-file="production.tfvars" -auto-approve

# 4. Verify
terraform output
# Check all outputs are correct

# 5. Monitor
# Monitor AWS console for resource health
# Monitor application logs

# 6. When done
# To destroy: terraform destroy -var-file="production.tfvars"
Conclusion: Infrastructure Automation Is Standard Now
Infrastructure automation with Terraform isn’t optional.
It’s standard practice.
Start today:
- Install Terraform
- Create simple infrastructure
- Expand to complex infrastructure
- Use modules for reusability
- Share with team
You’ll never click AWS console again.
Read Also :