PowerShell Security Best Practices Every System Administrator Should Know
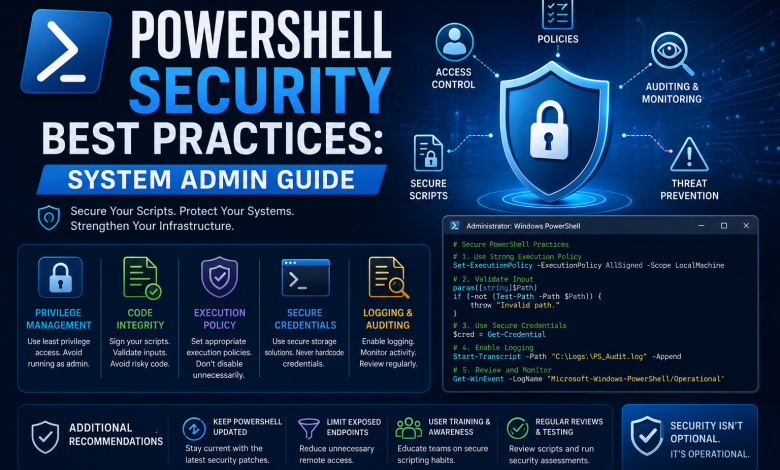
PowerShell is Your Most Powerful Security Tool (Or Your Biggest Risk)
I’ve seen it happen countless times:
A system administrator writes a PowerShell script. It works perfectly. They run it manually. Then one day, someone gets admin credentials and runs malicious PowerShell commands that bypass all your security controls.
The problem:
Most admins use PowerShell every day but don’t think about security. They treat it as a utility, not as a potential attack vector.
The reality:
PowerShell is the most dangerous tool in your Windows environment—not because it’s flawed, but because most people don’t secure it properly.
This article teaches practical PowerShell security that actually works:
Stop Searching Through Dozens of Articles.
Get a complete Windows Server hardening workflow with practical guidance, PowerShell commands, printable checklists, audit templates, and incident response resources—all in one toolkit.
- 📘 200+ Page Practical Playbook
- 📄 Hardening Checklists
- 📊 Excel Audit Worksheet
- ⚡ Top 50 PowerShell Commands
- 🛡 Security Event ID Cheat Sheet
- 🚨 Incident Response Quick Card
Instant digital download • One-time payment • Lifetime access
- Execution policies that prevent attacks
- Credential management (not in plain text!)
- Script logging that catches attacks
- Remote access security
- Secure automation practices
- Real-world examples
By the end, you’ll know how to use PowerShell as a security tool instead of a liability.
Part 1: Understanding PowerShell Security Risks
Why PowerShell Matters for Security
PowerShell runs with the same privileges as the user executing it. This means:
User with admin rights runs PowerShell
→ PowerShell has admin rights
→ PowerShell can do ANYTHING an admin can do
→ Malicious scripts can do ANYTHING an admin can do

This is why PowerShell security is critical.
Real attack scenario:
Attacker compromises user account: john@company.com
Attacker has access to john's computer

Scenario 1 (No PowerShell security):
- Attacker opens PowerShell
- Runs: Get-ADUser -Filter * | Set-ADUser -Enabled $false
- Disables all Active Directory users
- Company network down
- No audit trail (no logging)
- Nobody knows what happened

Scenario 2 (With PowerShell security):
- Attacker opens PowerShell
- Execution policy blocks: "Cannot be loaded because running scripts is disabled"
- Script logging shows: Attempt to bypass execution policy
- Alert sent to security team
- Attack blocked
- Full audit trail recorded
The difference? One line of security configuration.
Part 2: Execution Policies (First Line of Defense)
What Are Execution Policies?
Execution policies control whether scripts can run and under what conditions.
Level 1 (Most Restrictive):
Restricted
- Scripts cannot run at all
- Only interactive commands work
- Best for: Locked-down systems

Level 2 (Balanced):
AllSigned
- Only signed scripts can run
- Requires code signing certificate
- Best for: Enterprise environments

Level 3 (More Permissive):
RemoteSigned
- Local scripts run freely
- Downloaded scripts must be signed
- Best for: Most organizations

Level 4 (Least Restrictive):
Unrestricted
- All scripts run
- Warning for downloaded scripts
- Best for: Testing only (NEVER production!)
Common mistake:
Admin sets execution policy to Unrestricted for convenience
→ Malicious scripts can run
→ No protection whatsoever
→ This is how ransomware spreads
Implementing Secure Execution Policy
For Domain-Joined Computers (Recommended):
Use Group Policy to enforce execution policy:
Group Policy Editor → Computer Configuration
→ Administrative Templates
→ Windows Components
→ Windows PowerShell
→ Turn on Script Execution
→ Set to "Allow local scripts and remote signed scripts" (RemoteSigned)
Apply to all computers:
# On Domain Controller
New-GPO -Name "PowerShell Security Policy" -Comment "Enforce secure execution"
Set-GPRegistryValue -Name "PowerShell Security Policy" `
    -Key "HKLM\SOFTWARE\Policies\Microsoft\Windows\PowerShell" `
    -ValueName "ExecutionPolicy" -Value "RemoteSigned" -Type String

# Link to domain
New-GPLink -Name "PowerShell Security Policy" -Target "dc=domain,dc=com"

# Force update
gpupdate /force
For Individual Computers:
# Set execution policy for current user
Set-ExecutionPolicy -ExecutionPolicy RemoteSigned -Scope CurrentUser -Force

# Set for all users (requires admin)
Set-ExecutionPolicy -ExecutionPolicy RemoteSigned -Scope LocalMachine -Force

# Verify
Get-ExecutionPolicy -List
Output should show:
        Scope ExecutionPolicy
        ----- ---------------
MachinePolicy       RemoteSigned
   UserPolicy       RemoteSigned
      Process       RemoteSigned
  CurrentUser       RemoteSigned
 LocalMachine       RemoteSigned
Part 3: Script Logging (Catch Attacks)
Why Logging Matters
Execution policies prevent scripts, but advanced attackers bypass them. Logging catches them anyway.
Attack timeline:

2:00 PM: Attacker runs malicious script
2:01 PM: Script executes (bypassed execution policy)
2:02 PM: Script modifies files
2:03 PM: Script creates backdoor account
2:04 PM: Security team gets alert from logs

Without logging: Nobody notices until weeks later
With logging: Caught in 4 minutes
Enable PowerShell Script Logging
Step 1: Enable Module Logging
# Enable Module Logging for all modules
$path = "HKLM:\Software\Policies\Microsoft\Windows\PowerShell\ModuleLogging"
if (!(Test-Path $path)) {
    New-Item -Path $path -Force | Out-Null
}

Set-ItemProperty -Path $path -Name "EnableModuleLogging" -Value 1
Set-ItemProperty -Path $path -Name "*" -Value "*"

Write-Host "Module logging enabled"
Step 2: Enable Script Logging
$path = "HKLM:\Software\Policies\Microsoft\Windows\PowerShell\ScriptBlockLogging"
if (!(Test-Path $path)) {
    New-Item -Path $path -Force | Out-Null
}

Set-ItemProperty -Path $path -Name "EnableScriptBlockLogging" -Value 1

Write-Host "Script block logging enabled"
Step 3: Enable Transcription (Records Everything)
$path = "HKLM:\Software\Policies\Microsoft\Windows\PowerShell\Transcription"
if (!(Test-Path $path)) {
    New-Item -Path $path -Force | Out-Null
}

Set-ItemProperty -Path $path -Name "EnableTranscripting" -Value 1
Set-ItemProperty -Path $path -Name "OutputDirectory" -Value "C:\Transcripts"
Set-ItemProperty -Path $path -Name "IncludeInvocationHeader" -Value 1

# Create transcript directory
if (!(Test-Path C:\Transcripts)) {
    New-Item -ItemType Directory -Path C:\Transcripts -Force | Out-Null
}

Write-Host "Transcription enabled. Logs: C:\Transcripts"
Review PowerShell Logs
View in Event Viewer:
Event Viewer
→ Windows Logs
→ Application
→ Filter by Source: "PowerShell"

Look for:
- Event ID 400: PowerShell started
- Event ID 403: Engine stopped
- Event ID 800+: Script execution details
Or via PowerShell:
# Get recent PowerShell events
Get-EventLog -LogName Application -Source PowerShell -Newest 100 |
    Select-Object TimeGenerated, Message |
    Format-Table -AutoSize

# Export to CSV for analysis
Get-EventLog -LogName Application -Source PowerShell -Newest 1000 |
    Export-Csv -Path "C:\Reports\PowerShell-Events.csv" -NoTypeInformation
Part 4: Credential Management (Never Hard-Code Passwords)
The Biggest PowerShell Security Mistake
WRONG (Don’t do this):
# Password in plain text!
$username = "admin@domain.com"
$password = "MyPassword123!"
$cred = New-Object System.Management.Automation.PSCredential($username,
    (ConvertTo-SecureString -String $password -AsPlainText -Force))

# Now anyone who reads the script knows the password!
PROBLEM:
- Password visible in script
- Password in command history
- Password in event logs
- Password shared with anyone who sees code
- Password stored in plain text
This is how companies get breached.
Secure Credential Handling
Method 1: Use Windows Credential Manager (Recommended)
# Store credential securely (one-time setup)
$username = "admin@domain.com"
$cred = Get-Credential -Message "Enter credentials to store"
$cred.Password | ConvertFrom-SecureString |
    Set-Content "C:\Secure\admin-cred.txt"

# Retrieve credential in script (safe)
$credPath = "C:\Secure\admin-cred.txt"
$username = "admin@domain.com"
$password = Get-Content $credPath | ConvertTo-SecureString
$cred = New-Object System.Management.Automation.PSCredential($username, $password)

# Use credential securely
Get-ADUser -Credential $cred -Filter * | Export-Csv "C:\Reports\users.csv"
Method 2: Use Managed Service Account (Enterprise)
For servers, use Managed Service Accounts (MSA):
# Create MSA in Active Directory
New-ADServiceAccount -Name "ScriptRunner" -DNSHostName "scriptrunner.domain.com"

# Install on server
Install-ADServiceAccount -Identity "ScriptRunner"

# Use in script (no password needed!)
$cred = New-Object System.Management.Automation.PSCredential(
    "domain\ScriptRunner$",
    (Read-Host -AsSecureString)
)
Method 3: Use API Keys / Service Principals (Cloud)
For cloud services:
# Store in environment variables (CI/CD pipeline)
$apiKey = $env:API_KEY

# Or use Azure Key Vault
$secret = Get-AzKeyVaultSecret -VaultName "MyVault" -Name "api-key"
$apiKey = $secret.SecretValueText
Part 5: Remote Access Security
Secure WinRM (Windows Remote Management)
WinRM is how PowerShell remoting works. Secure it properly.
Enable WinRM Securely:
# Enable WinRM with HTTPS only (not HTTP!)
Enable-PSRemoting -Force

# Configure to use HTTPS
$thumbprint = (Get-ChildItem Cert:\LocalMachine\My |
    Where-Object {$_.Subject -like "*server.domain.com*"}).Thumbprint

Set-Item -Path WSMan:\localhost\Listener\*\Transport\HTTPS\Enabled -Value $true
Set-Item -Path WSMan:\localhost\Listener\*\Transport\HTTP\Enabled -Value $false

# Require authentication
Set-Item -Path WSMan:\localhost\Service\Auth\Basic -Value $false
Set-Item -Path WSMan:\localhost\Service\Auth\Kerberos -Value $true

Write-Host "WinRM secured with HTTPS + Kerberos"
Restrict Remote Access to Specific Users:
# Create remote access group
New-ADGroup -Name "PowerShell-RemoteAccess" -GroupScope Global `
    -Description "Users allowed remote PowerShell access"

# Configure in session configuration
Register-PSSessionConfiguration -Name RestrictedShell -ProcessName powershell `
    -RunAsCredential (Get-Credential) -Force

# Restrict to group
Set-PSSessionConfiguration -Name RestrictedShell -ShowSecurityDescriptorUI
Secure Remote Execution
Good: Define what scripts can run remotely
# Create approved scripts folder
New-Item -ItemType Directory -Path "C:\ApprovedScripts" -Force

# Only allow signed scripts
Set-ExecutionPolicy -ExecutionPolicy AllSigned -Scope Process

# Copy approved scripts to folder
Copy-Item "C:\Scripts\Update-Users.ps1" -Destination "C:\ApprovedScripts\"

# Remote users can only run from this folder
Invoke-Command -ComputerName server.domain.com `
    -ScriptBlock { & "C:\ApprovedScripts\Update-Users.ps1" }
Part 6: Secure Scripting Patterns
Pattern 1: Use #Requires for Security
# At top of every script
#Requires -Version 5.1
#Requires -RunAsAdministrator
#Requires -Modules ActiveDirectory

# This ensures:
# - Script won't run on older PowerShell
# - Script requires admin rights
# - Required modules are available
Pattern 2: Input Validation
# BAD: Trust user input
$username = Read-Host "Enter username"
Disable-ADAccount -Identity $username  # What if they enter: john; Remove-ADUser -Identity *

# GOOD: Validate input
$username = Read-Host "Enter username"
if (-not ($username -match '^[a-zA-Z0-9._-]+$')) {
    Write-Error "Invalid username format"
    exit 1
}
Disable-ADAccount -Identity $username
Pattern 3: Error Handling
# BAD: Ignore errors
$users = Get-ADUser -Filter *
$users | Disable-ADAccount

# GOOD: Handle errors securely
$users = Get-ADUser -Filter * -ErrorAction Stop
$users | Disable-ADAccount -ErrorAction Continue -ErrorVariable disableErrors

if ($disableErrors) {
    Write-Error "Errors occurred: $disableErrors"
    exit 1
}
Part 7: Audit & Compliance
Create Security Audit Script
# Audit-PowerShellSecurity.ps1
# Checks PowerShell security settings

Write-Host "PowerShell Security Audit" -ForegroundColor Green

# 1. Check Execution Policy
$execPolicy = Get-ExecutionPolicy
Write-Host "Execution Policy: $execPolicy"
if ($execPolicy -eq "Unrestricted") {
    Write-Host "⚠️  WARNING: Execution policy is Unrestricted!" -ForegroundColor Red
}

# 2. Check if logging is enabled
$logPath = "HKLM:\Software\Policies\Microsoft\Windows\PowerShell\ScriptBlockLogging"
$logEnabled = (Get-ItemProperty -Path $logPath -Name EnableScriptBlockLogging -ErrorAction SilentlyContinue).EnableScriptBlockLogging
Write-Host "Script Logging: $(if ($logEnabled) { 'Enabled' } else { 'Disabled' })"

# 3. Check WinRM security
$winrmSSL = (Get-ChildItem -Path WSMan:\localhost\Listener |
    Where-Object {$_.Name -like "*https*"}).Count
Write-Host "WinRM HTTPS: $(if ($winrmSSL -gt 0) { 'Configured' } else { 'Not Configured' })"

# 4. Check event log size
$appLog = Get-EventLog -LogName Application
$logSize = $appLog | Measure-Object -Property "Length" -Sum
Write-Host "Event Log Size: $([math]::Round($logSize.Sum / 1MB)) MB"

# 5. Review recent PowerShell events
Write-Host "`nRecent PowerShell Activity:"
Get-EventLog -LogName Application -Source PowerShell -Newest 10 |
    Select-Object TimeGenerated, EventID |
    Format-Table -AutoSize
Run monthly to verify security settings.
Part 8: Real-World Security Incident
Case Study: How Logging Saved the Day
Timeline of Attack:

2:15 PM: Attacker gains access to admin account
2:16 PM: Attacker opens PowerShell
2:17 PM: Attacker tries to run malicious script
2:18 PM: Execution policy blocks script
2:19 PM: Attacker tries to disable execution policy
2:20 PM: PowerShell logging captures attempt
2:21 PM: SIEM alert triggered

2:22 PM: Security team notified
2:23 PM: Account locked
2:24 PM: Investigation begins

3:00 PM: Incident contained
3:30 PM: Root cause identified (leaked credentials)
4:00 PM: Credentials reset, investigation complete

Result:
✓ Attack blocked within 10 minutes
✓ Full audit trail of attempted attack
✓ Root cause identified
✓ Threat prevented from spreading

Without logging: Attack could have run for weeks undetected
Cost of attack: $0 (prevented)
Cost of proper logging: <$1,000/year
ROI: Infinite
Part 9: PowerShell Security Checklist
Immediate Actions (Today):
☐ Set execution policy to RemoteSigned
☐ Enable script block logging
☐ Enable transcription
☐ Configure WinRM with HTTPS
☐ Test logging is working
This Week:
☐ Review recent PowerShell events
☐ Remove any hard-coded credentials
☐ Audit all PowerShell scripts
☐ Test remote access security
☐ Create approved scripts folder
This Month:
☐ Deploy Group Policy for execution policy
☐ Deploy Group Policy for logging
☐ Train team on secure scripting
☐ Create audit scripts
☐ Schedule monthly security audits
Ongoing:
☐ Monthly: Run security audit
☐ Quarterly: Review PowerShell events for anomalies
☐ Quarterly: Test incident response procedures
☐ Annually: Update security policies
Conclusion: PowerShell is Safe When Properly Configured
PowerShell itself isn’t the problem. Most breaches happen because:
- Execution policies set to Unrestricted
- Logging not enabled
- Credentials hard-coded
- No access controls
Implement the practices in this guide and your PowerShell environment becomes a security asset, not a liability.
Start with the checklist. Do the immediate actions today.
Your infrastructure will be more secure tomorrow.
🎯 Ready to Secure Your Windows Server?
If you’re looking for a practical, step-by-step resource with checklists, PowerShell commands, audit templates, and incident response guidance, explore the Windows Server Security Hardening Toolkit.
✅ 200+ page playbook ✅ Printable checklists ✅ Excel audit worksheet ✅ PowerShell reference guide