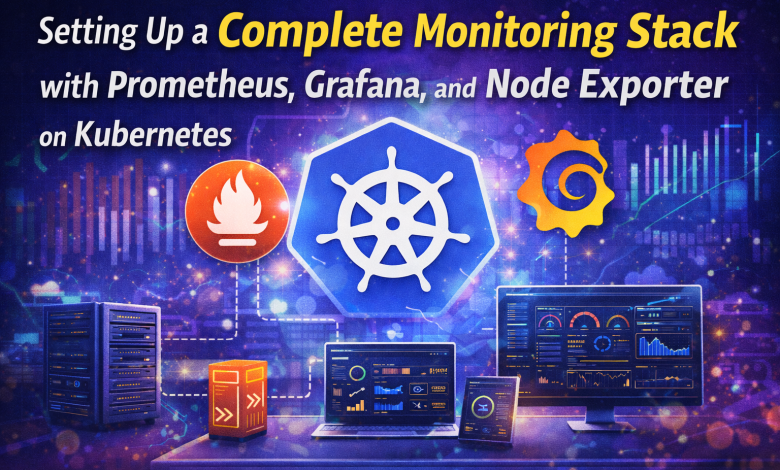
Kubernetes Monitoring Stack: Prometheus, Grafana & Node Exporter Setup (Step-by-Step Guide 2026)
Running applications on Kubernetes is easy… until something breaks.
When CPU usage spikes, pods crash, or nodes start failing, most beginners realize they have one big problem:
they have no visibility into what is happening inside the cluster.
This is where a proper Kubernetes monitoring stack becomes essential.
Without monitoring, troubleshooting becomes guesswork, and small issues can quickly turn into production outages.
In this hands-on guide, you will build a complete Kubernetes monitoring solution using
Prometheus, Grafana, and Node Exporter with the powerful
kube-prometheus-stack.
This is not just theory. You will deploy everything step by step and verify that your monitoring system is working in real time.
By the end of this tutorial, you will have:
- Prometheus collecting Kubernetes and node metrics
- Node Exporter exposing OS and node-level metrics
- Grafana visualizing your cluster through dashboards
- A clean monitoring namespace dedicated to observability
- A stronger understanding of how monitoring works in Kubernetes
This is not a vague overview. It is a practical Kubernetes monitoring walkthrough
that you can follow step by step and actually verify in your cluster.
Why Prometheus, Grafana, and Node Exporter?
Before you start deploying components, it helps to understand what each one does inside the stack.
Prometheus
Prometheus is the metrics collection and storage engine.
It scrapes targets at regular intervals, stores time-series data, and lets you query metrics using PromQL.
In Kubernetes, Prometheus is widely used because it integrates extremely well with dynamic environments.
Grafana
Grafana is the visualization layer.
It connects to Prometheus and transforms raw metrics into dashboards, graphs, and operational views
that DevOps engineers, SREs, and cloud engineers can use every day.
Node Exporter
Node Exporter collects host-level metrics from Linux nodes.
It gives you visibility into CPU usage, memory consumption, filesystem metrics, disk activity,
and network behavior. In Kubernetes, this is essential because node-level issues often affect
workloads long before application logs make the problem obvious.
Monitoring Architecture Overview
The stack we are about to deploy works in a simple flow:
Kubernetes Nodes
      │
      ├── Node Exporter collects OS and node metrics
      │
      ├── Prometheus scrapes those metrics
      │
      └── Grafana reads Prometheus data and visualizes it
In addition to node metrics, kube-prometheus-stack can also expose cluster-level metrics,
Kubernetes object health, and many default dashboards out of the box.
Prerequisites
Before starting, make sure you have the following:
- A running Kubernetes cluster
kubectlconfigured and pointing to that clusterhelminstalled locally- Permissions to create namespaces and install charts
Verify access to your cluster:
kubectl get nodes
You should see your Kubernetes nodes listed and in a Ready state.
Step 1: Create a Dedicated Monitoring Namespace
Do not deploy monitoring components into your default namespace.
A dedicated namespace makes operations cleaner and avoids mixing observability resources
with application workloads.
kubectl create namespace monitoring
Verify that the namespace exists:
kubectl get namespaces
The
monitoring namespace appears in the list.Step 2: Add the Prometheus Community Helm Repository
The easiest and strongest way to deploy this monitoring stack is through Helm.
We will use the Prometheus community charts.
helm repo add prometheus-community https://prometheus-community.github.io/helm-charts
helm repo update
This gives you access to the kube-prometheus-stack chart, which bundles
Prometheus, Grafana, exporters, and supporting Kubernetes monitoring resources in one deployment.
Step 3: Install kube-prometheus-stack
Now install the full monitoring stack:
helm install monitoring prometheus-community/kube-prometheus-stack -n monitoring
This command deploys several components, typically including:
- Prometheus
- Grafana
- Node Exporter
- kube-state-metrics
- Alertmanager
- ServiceMonitors and Prometheus rules
Check the pods:
kubectl get pods -n monitoring
You should see pods related to Prometheus, Grafana, Node Exporter, and other monitoring services.
Some pods may take a minute or two before reaching the Running state,
especially on smaller clusters.
Step 4: Verify That Node Exporter Is Running on All Nodes
Node Exporter is usually deployed as a DaemonSet.
That means Kubernetes schedules one pod per node.
kubectl get daemonsets -n monitoring
You can also inspect the Node Exporter pods directly:
kubectl get pods -n monitoring -o wide
Look for pods whose names include node-exporter.
The number of Node Exporter pods should generally match the number of cluster nodes.
A Node Exporter pod is running on every node in the cluster.
Step 5: Access Grafana
To view dashboards, you need access to Grafana.
For a lab or local environment, the easiest method is port-forwarding.
First, list services:
kubectl get svc -n monitoring
Then port-forward Grafana:
kubectl port-forward svc/monitoring-grafana 3000:80 -n monitoring
Open your browser and visit:
http://localhost:3000
To retrieve the Grafana admin password:
kubectl get secret monitoring-grafana -n monitoring -o jsonpath="{.data.admin-password}" | base64 --decode ; echo
The default username is:
admin
You should be able to log into Grafana successfully.
Step 6: Confirm That Prometheus Is Collecting Metrics
The stack usually configures Grafana and Prometheus automatically, but you still need to verify
that metrics are actually being collected.
Port-forward Prometheus:
kubectl port-forward svc/monitoring-kube-prometheus-prometheus 9090:9090 -n monitoring
Open:
http://localhost:9090
Try these sample queries:
up

node_cpu_seconds_total

node_memory_MemAvailable_bytes

node_filesystem_avail_bytes
If these queries return data, Prometheus is scraping your targets properly.
You should see live metric results rather than empty responses.
Step 7: Open a Node Dashboard in Grafana
One of the biggest advantages of this stack is that Grafana dashboards are often available quickly,
either pre-provisioned or easy to import.
In Grafana:
- Go to Dashboards
- Explore available dashboards
- Look for node, cluster, or Kubernetes monitoring dashboards
If you want to import a popular dashboard manually, one of the most widely used options is:
1860 - Node Exporter Full
This dashboard helps you visualize:
- CPU utilization
- Memory usage
- Disk usage
- Filesystem availability
- Network throughput
- Load averages
Once imported and connected to your Prometheus data source, you will have a strong operational view
of your Kubernetes nodes.
Step 8: Validate the Full Stack
At this stage, do not assume the stack is working just because the pods are running.
Validate the entire monitoring flow.
| Component | What to Check |
|---|---|
| Namespace | Monitoring resources are isolated inside the monitoring namespace |
| Prometheus | Queries return metrics successfully |
| Node Exporter | Pods run on all nodes |
| Grafana | You can log in and open dashboards |
| Dashboards | Node-level metrics are visible in charts |
This validation step matters because monitoring systems can appear healthy from Kubernetes’ point of view
while still being misconfigured functionally.
Common Problems and Troubleshooting
1. Pods Are Pending
This usually happens because your cluster lacks resources.
Smaller clusters may struggle to run the full stack.
Check pod details:
kubectl describe pod <pod-name> -n monitoring
2. Grafana Service Name Is Different
Helm releases can prefix service names differently.
Always verify service names before port-forwarding:
kubectl get svc -n monitoring
3. Prometheus Returns No Node Metrics
Confirm that Node Exporter is running and that Prometheus targets are healthy.
In Prometheus UI, check Status → Targets.
4. Dashboard Is Empty
This often means the wrong Prometheus data source is selected,
or Prometheus has not yet collected enough samples.
5. Access Denied or Connection Refused
Recheck port-forward commands and make sure the target service exists and the pod is healthy.
Production Best Practices
A lab setup is useful for learning, but production monitoring needs stronger planning.
Use Persistent Storage
Prometheus should use persistent volumes so metrics survive restarts and re-scheduling.
Secure Grafana
Change the default admin password immediately.
In production, integrate with SSO or your identity provider if possible.
Protect Access
Do not expose Prometheus and Grafana publicly without authentication and proper ingress security.
Enable Alerting
Monitoring without alerting leaves teams blind during incidents.
Prometheus Alertmanager can integrate with Slack, email, PagerDuty, and other channels.
Monitor Applications Too
Node metrics are only the beginning.
Serious Kubernetes observability also includes:
- Application-level metrics
- Pod health and restart rates
- Container resource consumption
- Ingress and network metrics
- Custom business metrics
Why This Stack Matters for Kubernetes Operations
Kubernetes is powerful, but operational complexity grows quickly as your cluster expands.
The combination of Prometheus, Grafana, and Node Exporter gives you a strong baseline for understanding:
- How healthy your nodes are
- Whether resource pressure is building
- How infrastructure behaves over time
- Where failures start before they affect users
This is exactly why this stack is so widely used in modern DevOps and platform engineering environments.
What You Learned in This Kubernetes Monitoring Tutorial
- How to deploy a complete Kubernetes monitoring stack
- How Prometheus collects and stores metrics
- How Grafana visualizes monitoring data
- How Node Exporter provides system-level metrics
- How to validate monitoring in a real Kubernetes environment
Final Thoughts
Setting up monitoring on Kubernetes is not a luxury.
It is one of the first things you should do if you want to operate containers responsibly.
In this guide, you deployed a complete monitoring stack using Prometheus, Grafana, and Node Exporter
through kube-prometheus-stack. You created a dedicated namespace, installed the stack with Helm,
verified Prometheus metrics, accessed Grafana, and validated node visibility across the cluster.
That gives you a real operational foundation.
From here, you can extend the stack with alerting, custom application metrics, long-term storage,
and deeper Kubernetes observability workflows.
For any DevOps engineer, SRE, or cloud engineer working with Kubernetes,
learning this stack is one of the most practical skills you can build.
Frequently Asked Questions
What is the best monitoring stack for Kubernetes?
The most popular and widely used monitoring stack for Kubernetes includes Prometheus, Grafana, and Node Exporter. Many teams use kube-prometheus-stack for easier deployment.
Is Prometheus enough for Kubernetes monitoring?
Prometheus is powerful for metrics collection, but it is usually combined with Grafana for visualization and Alertmanager for alerts.
What does Node Exporter do in Kubernetes?
Node Exporter collects system-level metrics such as CPU, memory, disk usage, and network activity from each node in the Kubernetes cluster.
Can I use this setup in production?
Yes, but you should add persistent storage, secure access, and configure alerting for production environments.
Next Step
After this setup, a strong next project would be:
- Adding Alertmanager with Slack notifications
- Monitoring your own application metrics inside Kubernetes
- Securing Grafana with Ingress and authentication
- Building a full observability stack with logs and tracing